Friday, October 17, 2014
IcoFX Portable Free Download !!

IcoFx is a professional icon and cursor editing tool - an all in one solution for icon creation, extraction and editing. This is a small but smart tool. Numerous features has been added to this software. But all these features are not my concern. Im just gonna show how to convert image into icon using this tool.
Before I start, could you please remember or at least have a look at the following posts?
Show Custom Picture on Pen Drive!!!
About two years ago, I published this post. Its a very cool trick. Most of the users were able to apply this to their flash drives. But some of them couldnt. Because they failed to create a proper icon of their desired images. Then I wrote another post.
Convert Image into Icon Online!
Its an online tool. Its quite handy. But sometimes you may need to work offline where no connection is available. And it doesnt have much customization capacity. Thats why Im writing about IcoFX Portable.
System Requirements
Its compatible with any running version of Windows with no special requirement. But you should be skilled enough to operate this tool. Its interface is little bit confusing I think!
Lets start by downloading the file (Its free of stupid Ads!).
IcoFX Portable (Free Download)
Its a zipped file. After downloading the file your should unzip it first. Then install IcoFx Portable for one time. Choose a proper location to install. It shouldnt be the drive C:, I mean the booting drive. Choose a different disk other than your Windows installation directory.
Now go to the folder where youve installed the software. Find IcoFX Portable. You can create a shortcut either on Desktop, Taskbar or Start menu to ensure easy access to this soft.
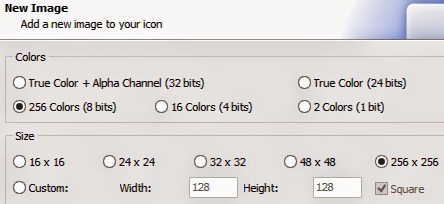
Lets convert image into icon. Run IcoFX Portable. Go to the File menu and hit on the Import Image (Press Ctrl+M). Now find and select an image from your hard drive. At the New Image window, select your desired colors and size. If you dont understand the options, keep it default. And then hit OK.

Now you will get a new window named Advanced Import. Crop or resize your image if necessary and hit OK. Were almost done!

Look below the Menu bar. There are both Windows and Apple Icon. Hit on the Windows icon to create icon for PC or hit on the Apple icon to create icon for Mac.

Now choose your prefereces regarding color and size. Then hit OK again.

Finally save the icon. Choose .ico format for Windows and .icns for Mac. Have you got it? Please comment . . . :)
Stay with Marks PC Solution to get more interesting IT topics!
Subscribe to:
Post Comments (Atom)
No comments:
Post a Comment
Note: Only a member of this blog may post a comment.