Showing posts with label to. Show all posts
Showing posts with label to. Show all posts
Thursday, October 30, 2014
How to Change the Drive Letters

Few days ago my PC got some problems. And I need to reinstall my Windows 8. After installing a fresh Windows, I got surprised! Drive D was missing from my drive list!
What happened actually? D drive was automatically named as E. And all the drives names were replaced by the next letter. Such as E with F, F with G and G with H. Though I dont the actual reason maybe it is caused by the new Windows, but I can show you how to get rid of this change.
If you face the same problem, or just want to change the name of your drives, you can follow my instruction.
- Right click on My Computer icon from desktop and select Manage.
- Now hit on the Disk Management from the left panel.
- Here you will get the list of your drives.
- Then right click on any drive that you wanna change, and hit on Change Drive Letter and Paths.
- Now Click on the Change and Select another letter for this drive from drop down list.
- Finally hit on the OK button for twice. Open your Explorer to see the change.
Stay with Marks PC Solution to get more interesting IT topics!
Sunday, October 26, 2014
How to Solve an Error “Cannot open Documents The” of MS word
-->
When MS word gets corrupt, it givesseveral types of error while opening it. Error message is depend oncause of corruption. You will receive different type of error messagein different scenario. Here I am providing solution for “Cannotopen "DocumentsThe” error message which you will get,when you try to open MS word file. Along with this error message youmay get few massages which are written below...
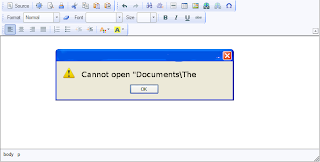
“Cannot open C:My”
“Cannot open "Test.doc"”
Main Cause of the problem: MS wordcorruption is not basic cause of this type of error. The main causeof this problem is registration of your MS word version is get expireand you need to re-register to fix this problem. The process ofre-registering is very easy and you can perform it very easily.
You can use bellow written method on MSword 97 and above version
- Boot your system.
- Click on Start --> Run
- When run box open type winword /r command and hit Enter.
Note: Dont forget to place space before forward slash.
After re-registering process is overthen double click on MS word file. You will able to open MS word file without any error. In case problem still persist then it signify that your word file is severely corrupted and in that case you need to some advance MS word repair software.
Saturday, October 25, 2014
How to Put WordPress Site Offline

WordPress Visibility option allows you to control who can visit your site, whether search engines will index it or not etc. In my last post, I discussed how to put blogger site offline. And in this post Im gonna talk about WordPress.
In my previous post, I discussed the reasons behind putting a site offline. Here I would like to repeat those reasons -


In my previous post, I discussed the reasons behind putting a site offline. Here I would like to repeat those reasons -
- If your site is new, you can discourage search engines to index your site. Because a new site with insufficient content will not get a good rank.
- If your site is private or subject to premium membership, you can disallow general people to view your contents.
- Due to political violations or religious issues, if your social security is under threat, you can temporarily make your site unavailable instead of deleting it.
Site Visibility Options
- Login to your WordPress site and go to Admin Panel. (ie. https://munnamark.wordpress.com/wp-admin)
- Go to Settings from the left pane and choose Reading. (As shown in the above image) (ie.https://munnamark.wordpress.com/wp-admin/options-reading.php)
- Now you will get the Reading Settings page.
- Move to the Site Visibility section. There you will get three choices.
- The first choice is the default option. It allows search engines to index your site.
- The second choice forbid search engines to index your site.
- And the third option makes your site private. That means only invited persons will be able to access your site.
- Choose any of the three options that is suitable for you.
Note: You can change the settings at any time.
Adding Users in a Private Site
If you make your site private, then you have to manually invite members to your site. Only invited members is capable of viewing your contents or writing posts in your site. To invite users, follow the steps below:
- Go to your WordPress control Panel
- Choose Users > Invite New (As shown in the above image) (ie. yoursite/wp-admin/users.php?page=wpcom-invite-users)
- Now you will get the invite users form. Type username or their emails. Choose one of the five roles (Contributor/ Author/ Editor/ Administrator/ Follower) for the invited members.
- Type an invitation message if necessary
- Finally hit on the Send Invitation button.
Then the invited user will get an email. If he accepts the invitation, you can view the member in the past invitation section. From there you can manage your members.
Hope youve clearly understand the topic. If you have any confusion, dont hesitate to leave a comment. :)
Get more tips on Blogging . . .
Stay with Marks PC Solution to get more interesting IT topics!
Thursday, October 23, 2014
Printer Pro For Allows You To Print From Your iOS Device

 Printer Pro for iPhone, iPod Touch and iPad allows you to print to most printers from your iOS devices. Click here for the iPad app and here for the iPhone and iPod Touch app. Printer Pro is not a universal app so you will need to buy the app separately for your iPhone and iPad in order to have the best experience. Printer Pro allows you to print to most Wi-Fi printer and any printer attached to your computer by downloading a desktop app. To test to make sure your printer is compatible you can download Printer Pro Lite by clicking here. Setting up is relatively quick and easy. Once you set up your printer the app will remember your printer and you will not need to set it up each time. Printer Pro allows you to print email attachments, files from Dropbox, Web pages, Photos and Contacts. Click read more below to see screen shots of Printer Pro.


This app was provided complimentary to the reviewer.
Saturday, October 11, 2014
HOW TO DRAW A PIE CHART IN MS WORD PART 1
MICROSOFT WORD DRAWING PROJECT No. 18 PART 1
TITLE: HOW TO DRAW A PIE CHART IN MS WORD
TYPE: MATHEMATICS DIAGRAM

A pie chart is also known as a circular graph. The circle is divided from the centre into several parts or sectors and each sector represents a proportion of the whole volume, amount or size of the data. The pie chart can be used in other subjects other than Mathematics. Drawing a pie chart which has no colours is not a difficult task. Actually, the real challenge is when you want to draw a coloured pie chart where each sector is filled with a different colour. Anyway, there is a way to do it in MS Word as you can see in the illustration above. Can anyone tell me how it is done? I believe that nothing beats the satisfaction of being able to create something on your own and knowing how to do it. Personally, I like to create my own clip art images with MS Word to be used in PowerPoint slides.
Friday, October 10, 2014
How to Create Password Reset Disk

For your computer security you can set start up password. Whenever you turn on PC, Windows ask you to enter password. Then you enter password and get access to the desktop. And all of us know that it is a normal process.
But, if your forget your password? Then what?
You might think experts can easily break it and have access to the PC! And as youre not expert so enter the DVD in the drive and start installing Windows again. And you lose all of your files and folders that is stored on installation drive.
But you can avoid such type of hazard very easily. I dont advise you to write down your pass in the diary or calender. Because this is not safe. Just spend few minutes to create a password reset disk. Its safe and easy. And there is no risk. Follow the steps below:
- First make sure youve connected your USB Flash Drive in the port. You dont need to format the disk. And your files will not be affected.
- Then go to the User Accounts from Control Panel.
- Now hit on the Create a password reset disk option from the left panel.
- Youll see Forgotten Password Wizard. Click Next.
- Select the drive that is to be used as reset disk. Click Next.
- Enter the current password if any. Otherwise leave it blank.
- Click next and wait for the processing. Click Next again. Then Finish.
The disk is ready for use. Now open your USB drive and look for a 2 KB file named userkey.psw. This is the file that can help you to reset the password. Dont delete it.
Now restart your PC and try to access by entering a wrong password. Youll see the Reset Password option. Click on it and type a new password. And from now you can use this password.
You can change your password as many time as you wish by the same disk.
 |
| Click to enlarge image |
Caution: Anyone can change your password if he knows about your reset disk. So make sure that unauthorized person is not familiar with your reset disk.
NB: This system has been tested on Windows 7 and 8. And it will work only on that PC from where the disk is created.
Fun Fact: Youve to create this disk before forgetting password. After forgetting this password, you cant create this disk.
Stay with Marks PC Solution to get more interesting IT topics!
Wednesday, October 8, 2014
Oregon Using the iPad to Assist Disabled Voters

Oregon is testing the iPad to assist disabled voters and allow them to vote privately. Some Oregon voters that are unable to vote using paper ballets will be able to vote using the iPad in tomorrows election as part of a pilot program. Voters with visual impairments, physical disabilities, dyslexia and other disabilities that make voting with paper ballets difficult will be able to vote using a custom iPad app. The app will have the ability to enlarge font size, improve contrast and read text aloud to assist disabled voters. The app also works with VoiceOver for improved accessibility. Blind voters will be able to connect their Braille displays to the iPad via Bluetooth in order to read the ballets. Users that use Bluetooth accessories will be able to connect them to the iPad in order to vote. The app will allow disabled voters to make their selections privately without election officials knowing which candidates the voter selected. Election officials made the following comments about voter privacy.
"Some people want to vote independently, and theyre the ones that were talking to."Laws require people with disabilities to have equal access and privacy while voting.


Monday, October 6, 2014
HOW TO CREATE GRAPHIC DESIGN IN MS WORD
MICROSOFT WORD DRAWING PROJECT No. 37
TITLE: HOW TO CREATE A DESIGN FOR AN APRON IN MS WORD
TYPE: GRAPHIC DESIGN
What do apple and health have in common? They are used in a popular proverb “An apple a day keeps the doctor away”. You have drawn the apron and the apple, then what’s next? Add in the suitable text using WordArt and you have yourself a design. I prefer to use Arial Black typeface because the letters are easy to read. I teach students how to draw Block Letters during Art lessons. The graph paper is useful in teaching students to draw block letters. Two pieces of graph paper are sufficient to draw the letters A to Z. The following Elements of Art were used to create this drawing: Line, Colour, Shape, Form and Space. In addition, the following Principles of Design were also used: Balance, Harmony, and Unity. A good design should be relevant to the theme. Therefore choosing the right illustration and text is important in creating a good design.

Now, let’s put the design on a t-shirt and see how it looks? What do you think?

Sunday, October 5, 2014
How to Share your presentation Online in PowerPoint 2013
If you to want to meet your client in real time to create a PowerPoint presentation, it was not possible in PowerPoint till now. To make it possible, Microsoft introduced a free public service that is Office Presentation Service in PowerPoint 2013 that creates a complete real time collaboration experience. Lets have a look of this feature:
Sharing a PowerPoint file:
Share your presentation by click on File > Share > Present Online & then select Office Presentation Service then Select the Enable remote viewers to download the presentation check box and click Present Online as shown in figure. This feature enables your client to download the presentation and view the slides on their own.

To send your meeting invitations to your clients, click on Copy Link to copy and paste the meeting hyperlink as shown in picture. Through this, your clients can access it, such as in a Skype chat window. Alternatively, you can send this link through email by selecting Send in Email option or select Send in IM to send using your existing IM chat client.

If you are ready to start present your presentation in front of your clients then just click on Start Presentation button. When your clients click on the hyperlink, a browser window will open and the presentation automatically will display. For this, your clients have no need to install PowerPoint or any other product installed on their computer.
If you want to end this presentation then just press Esc to stop Slide Show View, and then on the Present Online tab, click End Online Presentation.

Click on ‘End Online Presentation, to confirm end presentation.

You can also share a presentation with an embedded video. Your all clients can watch embedded video together.
Thanks for reading this article & take a live experience of this exciting feature by using above steps.
Sharing a PowerPoint file:
Share your presentation by click on File > Share > Present Online & then select Office Presentation Service then Select the Enable remote viewers to download the presentation check box and click Present Online as shown in figure. This feature enables your client to download the presentation and view the slides on their own.
To send your meeting invitations to your clients, click on Copy Link to copy and paste the meeting hyperlink as shown in picture. Through this, your clients can access it, such as in a Skype chat window. Alternatively, you can send this link through email by selecting Send in Email option or select Send in IM to send using your existing IM chat client.
If you are ready to start present your presentation in front of your clients then just click on Start Presentation button. When your clients click on the hyperlink, a browser window will open and the presentation automatically will display. For this, your clients have no need to install PowerPoint or any other product installed on their computer.
If you want to end this presentation then just press Esc to stop Slide Show View, and then on the Present Online tab, click End Online Presentation.
Click on ‘End Online Presentation, to confirm end presentation.
You can also share a presentation with an embedded video. Your all clients can watch embedded video together.
Thanks for reading this article & take a live experience of this exciting feature by using above steps.
Tuesday, September 30, 2014
Adding a logo to a Google Sites website
To add a logo to the header on your Google Sites website, you should create a logo as a GIF file that has a transparent background. As detailed in the procedure below, you can do this through Google Docs, the GNU Image Manipulation Program (GIMP), and Google Sites:
Read more »
- Open Google Docs, click Create new, click Drawing to display an Untitled drawing, click File, click Rename, and then type an appropriate name, such as "TClogo." Note: While using separate components (such as rectangles, circles, and triangles) to create your logo, set the boarder lines to Transparent so that your logo later displays smooth edges.
- Download your new drawing as a JPEG file, use GIMP to crop the logo, save it as a JPEG file (such as TClogo01.jpg), click Image, click Scale Image, set image height to 100 pixels, click Scale, click File, click Save, and then click Save again.

- Click File, click Save As, click Select File Type (By Extension), select PNG image, click Save, and then click Save again.

- Click Colors, click Color to Alpha, click OK, click File, and then click Save. This makes the white background of your logo transparent.

- Click File, click Save As, click Select File Type (By Extension), select GIF image, click Save, click Export, and then click Save.

- Sign into your Google Sites website, click More actions, click Manage site, click Site layout, and then click change logo.

- Select Custom Logo, click Choose File, navigate to and select your GIF logo file (such as TClogo01.gif), click Open, click OK, click Save Changes, and and then click Return to site.
HOW TO DRAW A COFFEE MUG IN MS WORD
MICROSOFT WORD DRAWING PROJECT NO. 2
TITLE: A COFFEE MUG ON A COASTER
TYPE: ILLUSTRATION

The tools needed to create the coffee mug are as follows: Can; Oval; Donut; Heart and Curve line. Draw a shape with the Curve line and then insert a picture into it by doing the following: Shape Fill > Picture > Select a picture from a folder > Insert. To create the shadow effect, click the Oval shape at the bottom and then do the following: click Shadow Effects > Drop Shadow > Shadow Style 3 and then nudge the shadow into place using the Shadow Settings. Use the Edit Points function to adjust and fine-tune the curve lines.

Monday, September 29, 2014
HOW TO DRAW A LIGHTED CANDLE IN MS WORD
MICROSOFT WORD DRAWING PROJECT No. 23 PART 1
TITLE: HOW TO DRAW A LIGHTED CANDLE IN MS WORD
TYPE: GRAPHIC DESIGN
This design can be used in many ways. I’m just trying to show how this illustration is created in MS Word. Sometimes when there is a blackout in my area due to power failure, I will light up some candles to lighten the place up. I like to put the candles on metal container covers and tin cans. Hence, this experience gave me the idea for this graphics project. The picture below shows a lighted candle placed in a tin can filled with sand. You can also see that the candlelight is in four subtle shades of yellow. How do you create these tonal values?
Here are some tips for readers to try drawing this at home. The tools needed to create this drawing are as follows: Oval, Can, Curve line, and Rectangle. By the way, make use of the Fill Effects and More Fill Colors options to add shading and decorative effects to the illustration.

Tools to Make Typing on iPad Easier


Typing on the iPads touch screen can be difficult and slow compared to a physical keyboard. While typing on the iPad you must look at the screen because you can not feel the keys. For people that can not see the screen typing on the iPad is slow. There are a couple of tools to solve this problem. The first solution is the iPad keyboard dock. The keyboard dock plugs into the iPads dock connector and works with the iPad and iPad 2. The keyboard is similar to desktop and laptop key boards but has function keys specialized for the iPad. The keyboard dock costs $69 from Apple. Another option is a Bluetooth keyboard which connects to the iPad wirelessly. There are many Bluetooth keyboards on the market. Bluetooth keyboards can improve your typing experience on the iPad. Yet another solution is Keyguard which is a clear piece of plastic with holes cut where the virtual keys are. Keyguard fits on the iPad so it does not slide off. Keyguard allows you to feel the location of the virtual keys. Keyguard comes it portrait and landscape views. Each orientation of Keyguard costs $19.95 from Lasered Pics. With these tools you will be able to type faster and more accurately on the iPad.
How to install virtual XP on Ubuntu
After you install virtualization software, such as VirtualBox OSE, on an Ubuntu host operating system, you can install almost any other guest operating system to run simultaneously with its Ubuntu host. A guest operating system is also called a VM (Virtual Machine). This article explains how to install VirtualBox on an Ubuntu host, and then run it to install Windows XP as a guest operating system, (also called a Windows XP client, or a virtual machine XP).

Installing VirtualBox
To install VirtualBox OSE on Ubuntu, do the following:
- Click on the Applications menu to display its drop-down list.
- Click on Add/Remove to display the "Add/Remove Applications" window.
- Select VirtualBox OSE, and then click on Apply Changes to display its dialog.
- Click on Apply to install VirtualBox OSE.
Setting Up VirtualBox
To set up VitualBox, do the following:
- Use Applications -> Accessories -> Virtual Box OSE to display the "Welcome to VirtualBox" window.
- Click on New to display the "Welcome to the New Virtual Machine Wizard."
- Click on Next to display the "VM Name and OS Type" window, type a name (such as MyVirtualXP), select the Microsoft Windows Operating System, and then select the Windows XP Version.
- Click on Next to display the "Memory" window, accept the default Base Memory Size, and then click on Next to display the "Virtual Hard Disk" window.
- Click on New to display the Welcome to the "Create New Virtual Disk Wizard," click on Next to display the "Hard Disk Storage Type" window, accept the default Storage Type, and then click on Next to display the "Virtual Disk Location and Size" window.
- Set Size to approximately 20 GB, click on Next to display the "Summary" window, and then click on Finish to display the "Virtual Hard Disk" window. Accept the default virtual boot disk.
- Click on Next to display the "Summary" window, click on Finish to display the "VirtualBox OSE" window, and then close that window.
Installing Virtual XP
To install Windows XP as a guest operating (virtual XP, virtual machine XP) system on your Ubuntu host operating system, do the following:
- Use Applications -> Accessories -> Virtual Box OSE to display the "VirtualBox OSE" window.
- Place your Windows XP installation CD into your CD drive, and then click on the Settings icon, click on CD/DVD-ROM, and then select (check mark) Mount CD/DVD Drive.
- Click OK to redisplay the "VirtualBox OSE" window.
- Click on the Start icon to display a "VirtualBox Information" window that explains the "Auto Capture" keyboard. (The host key is the right Ctrl key.) This lets you switch the keyboard (and, separately, the mouse) between Ubuntu and its virtual XP.
- Click OK to close the "VirtualBox Information" window, and then follow the prompts to install a Windows XP client (virtual XP, virtual machine XP) on your Ubuntu host.
Important: Before you can install updates to your
Windows XP client, and before it can run correctly,
you must install its Guest Additions
according to the section below.
Windows XP client, and before it can run correctly,
you must install its Guest Additions
according to the section below.
Installing Guest Additions on Virtual XP
To install Guest Additions on your Windows XP client, do the following:
- From within your Windows XP client window, press right Ctrl, select Devices, and then click Install Guest Additions to display the "VirtualBox - Question" window.
- Click Yes and then click Download to download the CD image and display the download-progress indicator in the lower left corner.
- After the CD image downloads successfully, click Mount to display the Guest Additions Setup Wizard and then click Next to display the License Agreement.
- Click I Agree to display the default Destination Folder, click Next, and then click Install to start installing Guest Additions.
- At each Microsoft warning, click Continue Anyway.
- Select Reboot now and click Finish.
How to Solve “This file is not in a recognizable format” Error of MS excel
 Image via Wikipedia
 -->
MS excel is one of the most importantspreadsheet application for computer users. Storing and managing data is very easy with Ms excel. All important data saved inside these excel sheet. Imaging the situation in which you are trying to open an important excel sheet but could not do so, it gives some error. These errors means that your spreadsheet is get corrupt and you need to repair it to repair your valuable data. Excel recovery is required to repair this damaged .xls sheet.
Microsoft offer solution for corrupt excel sheet where you have to link the corrupt spreadsheet with news one. But this solution work hardly ever. So here I am going to explain a solution to easy repair of damaged excel sheet.
Follow the steps given below to:
- Open an undamaged workbook and a new workbook.
- In the Insert menu of new workbook find hyperlink and create link with undamaged workbook. Now close undamaged workbook.
- The link in cell A1 displays the path to the non-corrupted file. Edit the formula in cell A1 by substituting the corrupted file name for the existing one.
- If it works, the corrupted file will open. In this case, copy the formula down and across until the link returns blank cells.
- Select the data, copy it, and choose Paste Special from the Edit menu. In the resulting Paste Special dialog box, click Values and click OK to paste the data over itself. Doing so removes the link formula, but the values returned by the link remain.

How to Remove Facebook Timeline

Facebook users are often dissatisfied with it due to its controversial activities. One of them is Facebook timeline. Probably this is the most important issue at present for Facebook users.
Timeline is a new kind of profile that lets you highlight the photos, posts and life events that help you tell your story. If you activate timeline then youll have 7 days to preview whats there now. This gives you a chance to add or hide whatever you want before anyone else sees it.
If you activate timeline once then there is no official way to deactivate it! Many users find it too complex as well as boring.
If you wanna change back to the old style profile or if you havent got Timeline yet, but just wanna see your friends Timeline pages in the old style profile format, this guide is for you.
If you visit a personal Facebook Timeline with IE 7 then you will be shown old style profile page for that person. Because FB havent created any version of timeline that is compatible with IE 7.
But IE7 is no longer using by the users due to its several limitations and security issues. Now follow the steps below for your browser:

Google Chrome
To change Google Chromes User Agent you first need to download the appropriate file below, depending on what Operating System you are using. The content of the file is basically the command listed below in the pale blue box.
Chrome on Windows Vista & 7
If you are using Windows Vista or 7 the command in the file that will run Chrome with IE7 as the user agent is as follows :
"%USERPROFILE%AppDataLocalGoogleChromeApplicationchrome.exe" --user-agent="Mozilla/4.0 (compatible; MSIE 7.0; Windows NT 6.0)"
- Download (Right Click on the link, select Save link as... and save the .bat file to your Desktop)
- Then Install the F.B. Purity browser extension, as it will fix a lot of the display glitches that will occur when you have your browser set to impersonate IE7.
- Close all running Chrome browser Windows and Tabs, then click the previously downloaded .bat file and it will run Chrome with IE7 as its user agent.
- Now visit a personal Timeline page and you will see that it is now displayed as a normal, old style profile page. If at any point, you wanna go back to using the normal User Agent, just close all Chrome windows and then open Chrome using your usual Chrome Icon, instead of the Bat file.
Try the Easiest Way to Remove FB Timeline Now!!
Chrome on Windows XP
If you are using Windows XP the command in the file to start Chrome with IE7 as the UserAgent is as follows:
"%USERPROFILE%Local SettingsApplication DataGoogleChromeApplicationchrome.exe" --user-agent="Mozilla/4.0 (compatible; MSIE 7.0; Windows NT 6.0)"
- Download (Right Click on the link, select Save link as... and save the .bat file to your Desktop)
- Next Install the F.B. Purity browser extension, as it will fix a lot of the display glitches that will occur when you have your browser set to impersonate IE7.
- Close *all* open Chrome browser Windows then click the previously downloaded .bat file and it will run Chrome with the IE7 user agent.
- Now visit a personal Timeline page and you will see that it is now displayed as a normal, old style profile page. If you wanna go back to using the normal User Agent, just close all Chrome windows and then open Chrome using your usual Chrome Icon, instead of the Bat file.

Its easy to switch Firefoxs User Agent to IE7, the steps are as follows
- Install the "User Agent Switcher" Extension from addons.mozilla.org/firefox/addon/user-agent-switcher/
- Install the F.B. Purity browser extension, as it will fix most of the display glitches that occur when you switch the browsers User Agent to IE7, and it also has a lot of other cool and useful features for customising Facebook.
- Go to Firefoxs "Tools/User Agent Switcher/Internet Explorer" menu and select "Internet Explorer 7"
- Now go and view a personal Timeline page, it will be displayed in the old Profile format. BTW If you want to at any point switch the User Agent back to normal, just set the User Agent to "Default User Agent" or else just disable the "User Agent Switcher" extension.
- Now go and view a personal Timeline page, it will be displayed in the old Profile format. BTW If you want to at any point switch the User Agent back to normal, just set the User Agent to "Default User Agent" or else just disable the "User Agent Switcher" extension.

Safari on Mac & Windows
- Install the F.B. Purity browser extension, this will fix most of the display glitches that occur on Facebook when you use the IE7 User Agent, and it also has a lot of other cool and useful features for customising Facebook.
- To switch the User Agent in Safari, you need to first go into the "Preferences" menu, select "Advanced", then tick the "Show Develop menu in menu bar" option, then exit the preferences menu.
- Now click the page icon menu (next to the cog wheel icon) then select the develop/user agent menu, there you can choose the useragent you wish to use for the current website you are viewing. Select Internet Explorer 7.
- Now view any personal Facebook Timeline page and it will be displayed in the old style Profile format.
N.B. If you want to restore your User Agent to normal in Safari then just follow Steps 1 and 2 again, but this time select the "Default" user agent

Opera on Windows, Mac or Linux
- Install the FB Purity browser extension, which will fix some of the display problems that arise when you set your browser to impersonate IE7, it also gives you lots of options for hiding spam and other news stories and facebook features that you dont want to see.
- To set the custom user agent in Opera, enter "opera:config#ISP|Id" into the url/address bar, then enter the Custom User Agent string "Mozilla/4.0 (compatible; MSIE 7.0; Windows NT 6.0)" and click "Save"
- Restart your browser and view your profile page, or any other personal Timeline profile page, and it will display it in the old Profile format
N.B. If you wanna restore your User Agent to normal in Opera, just follow the first part of step 1 again, and then click the "Default" button then click "Save"
If you hate Timeline like most of the users then you may submit a complain directly to Facebook about it. To do so, go to Facebooks Official Timeline Feedback form.
Try the Easiest Way to Remove FB Timeline Now!!
How to repair or rebuild your desktop PC
Although many people consider full-size desktop PCs too old fashioned, they have one great advantage over other PCs, including laptops, netbooks, tablets, and most all-in-one desktops: You can easily repair a desktop PC, or rebuild it if necessary. If you are careful and patient, this can save you a lot of money. You are not limited to replacing only pluggable components, such as hard drives and memory modules. If necessary, you can rebuild your PC by replacing its motherboard (mainboard).

Read more »
Repairing your desktop PC - After your desktop PC fails, you need to determine which component to replace. When you try to boot your system, does it display a message? For example, if it displays "DISK BOOT FAILURE," you can almost certainly correct the problem by replacing the hard drive. However, if your system displays no message and all its indicators are dark, you might need to replace its power supply. If replacing the power supply does not repair your PC, you can try rebuilding it by replacing its motherboard (mainboard).
Rebuilding your desktop PC - To replace the motherboard of a desktop PC, you need remove most of its components, remove its defective motherboard, install a new motherboard, and then reinstall the other components, thereby rebuilding it. To rebuild your PC, do the following:
- Disonnect all power supply cables and move them out of your way.
- Remove all pluggable components from the old motherboard, such as its processor and its memory modules. Note: Avoid static-electric damage to these components. Before removing each component, be sure to first touch any bare-metal surface in the PC case. Store the components carefully (in antistatic bags if possible) because you will reinstall them later.
- Order a replacement motherboard. If you cannot find an exact match (such as identical model number) order the same type (such as micro ATX). Examine its specifications to verify it supports your existing components, including the processor (such as AMD Athlon) and RAM memory (such as DDR2).
- After your new motherboard arrives, and before you install it, verify that its front-panel sockets match the front-panel plugs in your old PC case. If not, you need also order a new PC case.
- Rebuild (reassemble) your PC.
- Install an operating system. If you install Microsoft Windows, you need to also install motherboard drivers.
- Test your PC to verify that it runs correctly.
Convert Drives to NTFS without Formatting!

Often you may need to convert your hard drives from FAT/ FAT32 to NTFS. If you have to convert all drives of your PC, then it will be really difficult for you to back up your files. Because, in order to convert drives, you have to format it. And in that case you may need to set up the whole computer. But there is an easy option for you to do this job. And you dont need to format your drive. Even you dont need to back up your files!
Okay lets start -
- Open Notepad
- Copy and paste the following code in the Notepad
title Marks PC Solution!3. Save the file as NTFS.bat
convert c: /FS:NTFS
convert d: /FS:NTFS
convert e: /FS:NTFS
convert f: /FS:NTFS
convert g: /FS:NTFS
convert i: /FS:NTFS
convert k: /FS:NTFS
msg %username% NTFS Converter: Presented by www.markspcsolution.com!
Look at the drive list. Ive used C, D, E, F, G, I, K. If your drive letters are different just make change in the drive letter. And if you need to omit something, just delete it.
Suppose, if you need to convert only C Drive then you dont need to write the following lines in notepad.
title Marks PC Solution!
convert c: /FS:NTFS
msg %username% NTFS Converter: Presented by www.markspcsolution.com!
If your desired drive letter is L, then type convert l: /FS:NTFS. By this way you can convert any other drive into NFTS.
Note: If you wanna convert from NTFS to FAT32 then you need to format it. So before converting to NTFS, make sure you really wanna do this. Otherwise you need to format the drive to back to the FAT file system.
How to use command line add on to repair invalid zip files
 |
| Image via Wikipedia |
Zipped file make it much easier to send and receive large files through e-mails. With the use of compressed files format (like .zip) we can convert large files into small files that can be sending via e-mail. But these zip file may get corrupt due to several reason like virus attack, at the time of attachment with slow Internet; improper downloading of zipped files etc. In the file zip corruption situation you cannot access your data which is present inside zipped file. In that case you need to use some repair method or use zip recovery software to repair corrupt zipped file.
WinZip offers several methods to repair corrupt .zip or .zipx files depend of corruption cases. Invalid zip file corruption case can be handled by WinZip Command Line Support Add-On. But this command line support add-on not support of all version of WinZip it works for WinZip 10.0 and later versions. Depends on your version of WinZip you can download appropriate version of command line support add-on from here.
Follow the steps written below to use command line support add on...
- Click Start, click All Programs, and click Accessories
- Right click Command Prompt and choose Run as administrator
(Windows XP: Left click Command Prompt) - Change directories to the folder where the corrupted Zip file is located.
- Type: "C:Program FilesWinZipwzzip" -yf zipfile.zip
You can use below written command if zip file is split or spanned
"C:Program FilesWinZipwzzip" -yfs zipfile.zip
WZZIP will create a new Zip file with a fixed suffix in the file name. The original Zip file will not be modified. Only the data in the original Zip file is used. I am sure that above method will fix your Invalid zip fileproblem. For any reason if above method didnt work for you then use some zip recovery software which is compatible with your system configuration to solve the problem.

Subscribe to:
Posts (Atom)